RSS Feed

November, 2013

  1. Typographic Art

    November 21, 2013 by Daniora

    IMG_7705

    They say that a picture is worth a thousand words. There are times, though, when a dozen or so words can make a very pretty picture.

    Typographic art is very popular these days. And for good reason. Text based art is can be adapted to any style, mood, or theme. It can be painted, a decal, or framed. It’s also really easy to do yourself. I used Photoshop for my own text art project, but even something as simple as Word will work. There are lots of great resources for free fonts, dafont.com being my favorite. If you’re one of those people with lovely handwriting or someone who does calligraphy, you can make them by hand instead of producing them digitally.

    Commercially made text prints and vinyl decals are readily available just about anywhere that sells home goods or framed art. There are also plenty available on Etsy, either as prints or as downloadable files you can print yourself.  With just a little time and some creativity, though, you can put together your own text art that will perfectly suit your specific taste and needs.

    My kitchen is a hallway. It’s a long, thin room with a pretty awkward wall at the far end. That wall was empty for months after we moved in. I thought for a while that I would try and create some sort of window type of wall art, since the kitchen lacks any openings other than the doorway. I tried finding something that would suit my needs, but nothing seemed quite right. I also ran into the added challenge of having to choose something that wouldn’t be too obtrusive since the sink is right against the wall. The last thing I needed was to hang something that we would knock off the wall every time we did the dishes.

    IMG_7704

    Then I wound up with a pile of frames from a yard sale. There were four matching 8×10 black frames. I decided they would fit perfectly in the space that I had to work with. It was then just a question of finding something to put into them.

    I thought at first that some food-based photographs or illustrations would work. Again, I scoured the internet, but I didn’t find anything that really caught my attention. When I was browsing on Etsy, I did find a few posters that were typographic art of quotes regarding food. I liked them, but none really fit my needs, and I couldn’t find four that went together.

    Well, this art degree has to be good for something. I sat down to find quotes about food and cooking that fit my personality. A quick Google search yielded more results than I could handle. I had to pare it down to four, content in the fact that when I got bored with these, I could always swap them out for new ones.  It was then a fairly simple matter of choosing fonts and arranging the words in a pleasing manner. I added colored backgrounds, y’know, for color. One could just as easily put the text over a stock photo or something with a little more interesting than a plain color field, but this worked better for my purposes.

    Once I was happy with the way they looked, I took the file down to my local Staples to have them printed on card stock. I could have printed them at home, but having them printed out had a couple advantages. The first was that with a colored background I’d be using a TON of very expensive ink. A color print on card stock usually runs about $1. Secondly, with large fields of color like these, I find laser printing generally looks a lot smoother. All I had to do then was trim them out, frame them up, and hang them.

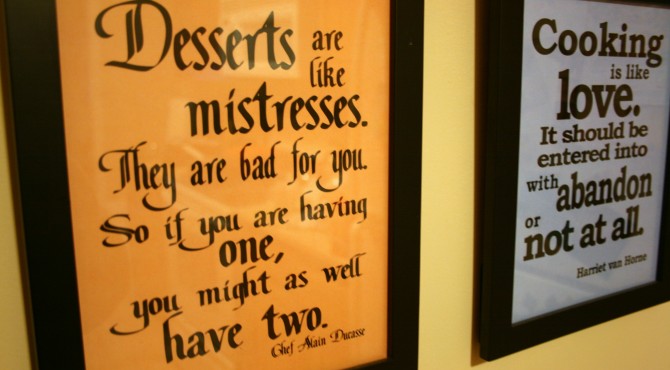
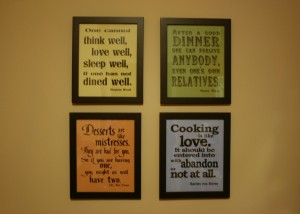
    The finished product.

    The finished product.

    Of course, hanging them is easier said that done. I know, they’re not perfectly even. Then tend to not hang perfectly straight. In spite of that, I adore them. They’ve been up for almost a year and I have not yet felt compelled to change out the quotes yet, so I must have chosen well.

    As a bonus, here’s the file of the prints that hang in my kitchen. Feel free to use them yourself!

    Additional bonus. Kinetic typography is a thing. There are videos. I adore them. Here’s one all about words.
  2. The Biggest Batch of Cranberry Sauce Ever

    November 17, 2013 by Daniora

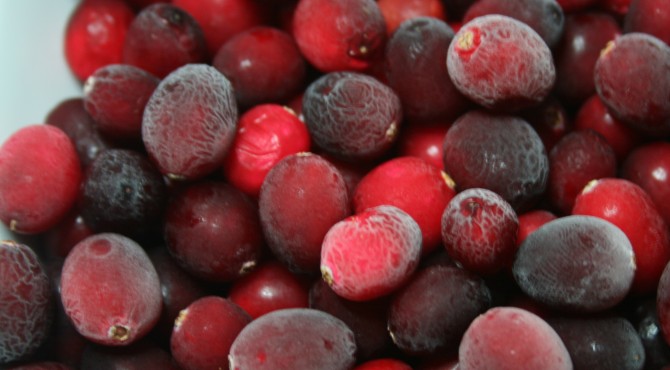
    Cranberries02

    Autumn in New England means a lot of things. Leaves changing, the chill in the air, pumpkin flavored EVERYTHING. It’s also cranberry harvest time. Thanksgiving is coming, and no turkey dinner would be complete without cranberry sauce.

    I will admit that I am a big fan of jellied cranberry sauce from a can. It’s yummy and comforting. However, it can’t hold a candle to home made.

    When I started making my own cranberry sauce, I used to use the basic recipe from the bag consisting of cranberries, sugar, and water. Those ingredients, when combined over heat, do certainly make something one could consider cranberry sauce. It’s just not particularly good.

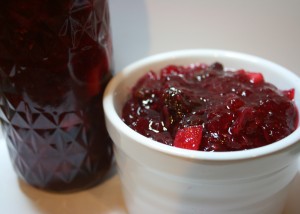
    This recipe came to me a few years ago from a friend of mine, and I’ve been making it every year since. The addition of apples, citrus, and sweet raisins can make a cranberry skeptic into a fan.

    This year, I decided to go big. The recipe takes a bit of time to make, and so I figured I’d just make all the sauce I’d need for the entire holiday season in one go. That means there was canning involved.

    Now with real cranberries!

    Now with real cranberries!

    Cranberry Sauce

    Ingredients


    • 1 (12-ounce) bag of fresh cranberries, cleaned
    • 1 3/4 cups sugar
    • 1 Granny Smith apple, peeled, cored, and chopped
    • 1 orange, zest grated and juiced
    • 1 lemon, zest grated and juiced
    • 3/4 cup raisins


    1. Cook the cranberries, sugar, and 1 cup of water in a saucepan over low heat for about 5 minutes, or until the skins pop open.
    2. Add the apple, zests, and juices and cook for 15 more minutes.
    3. Remove from the heat and add the raisins.
    4. Let cool, and serve chilled.


    Simple! Couldn’t be easier! Then, just put it in a jar and you’re all set! Piece of cake!

    Okay, well, actually the recipe is really easy, and if you’re just making a single batch for nearly immediate consumption, it works out quite well. When you decide to triple the recipe and then can it, things get slightly trickier.

    Let me walk you through how the process actually goes.

    First off, put the giant pot of water for canning on the stove. This will take about 3 years to boil, so get it started early. Put the clean jars in so that they can boil and sterilize.

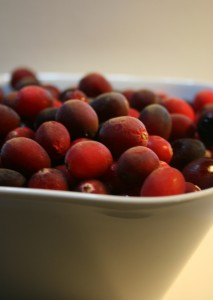
    Cranberries

    Next, take the three bags of cranberries out of the freezer. They’ll be in the back, under all the other stuff. Dump them into a bowl. Now, you’ll need to sort through them, pulling out any little bits of stem or any shady looking cranberries. Your fingers will get cold. Rinse the berries off and put them in the pot. You will second guess the size of the pan you have chosen, but will go with it anyway. You hope this isn’t a mistake.

    Add the recommended amount of water.

    Do the math for the amount of sugar you need for a triple batch of sauce. Check the math. Check it one more time. Measure out the sugar, trying not to think about it. Dump it into the pot with the water and cranberries. You will now have a mass of frozen cranberries with an uncomfortable amount of sugar on top. This is perfectly normal. Turn on the heat.

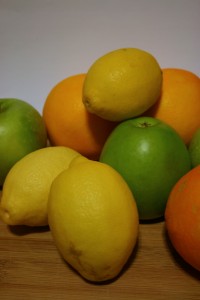
    Fruit

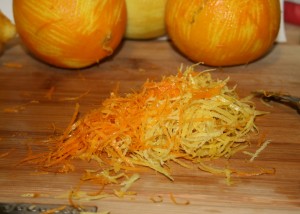
    While your cranberry-sugar monstrosity thaws, it’s time to deal with the other fruit. Peel the apples. This takes way longer than you think it should. Every time. Cut the apple into tiny little pieces. Admire your excellent knife skills. Turn your attention to the citrus fruit. Look for the zester. It will not be in the drawer where you think it should be. Ask other utensils if they’ve seen it. Once you find it, remove the zest from the citrus, careful not to get any of the pith. This will yield a lot of zest. *Added benefit: Your hands will smell like citrus for hours.

    Zest

    Zesty!

    By this time, the cranberry sauce over on the stove should have started to heat up. You know things are progressing when you can hear the hiss and pop of the berries exploding. This is a good thing. Once most of the berries have started popping, add the zest and the apple pieces. Stir well.

    Cut the zested fruit in half. Juice said fruit into the pot of cranberry sauce. *Pro Tip: Squeeze citrus fruit into your hand over the pot in order to catch any rogue seeds. Nothing ruins Thanksgiving like biting down on a lemon seed.

    Let the sauce cook for a good 15 minutes. This will help release the pectin from the apples, helping your cranberry sauce gel later on. When everything is nicely cooked, turn off the heat.

    Once the sauce is ready and the jars are sterilized, it’s time to put the two together. Suddenly remember that you have to add the raisins. Dump them in and stir. Then you’re ready to can.

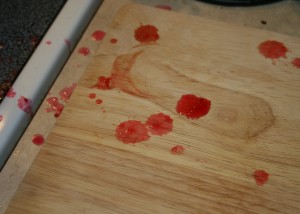
    I’m going to let you in on a little secret. Every photo you’ve ever seen of someone in a pristine apron lovingly ladling jam into a jar with a serene smile is a lie. These calm people are not spooning molten hot fruit-and-sugar based napalm into tiny glass jars. They’re all staged. Real canning is messy, serious business. There are reasons why I never post photos of canning in progress; it’s not pretty. By the time I’m done, my counter top looks like something out of Dexter.

    Oh, the horror!

    Oh, the horror!

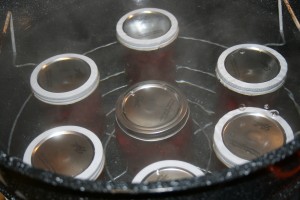
    Once the jars are filled, the rims have been wiped clean, and the rings have been screwed on tight (“Yup, I’ll just grab this jar and screw on this metal ring. Oh, that’s right, it’s filled with magma.”), then they go back into the giant pot of water to boil for 15 minutes. After that, it’s a simple matter of letting them cool.
    Canning
    All joking aside, it is a lot of work, but getting all this done ahead of time will save me a lot of heartache in the end. I always wind up cooking lots of complicated things for holiday gatherings; it’s who I am. Having this one thing done early will come in handy.
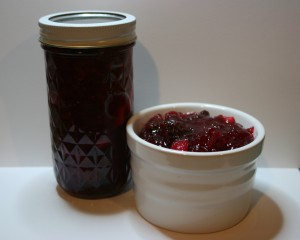
    FinishedProduct


  3. Emma’s Nemo Dress

    November 14, 2013 by Daniora

    Attitude

    Strike a pose!

    I mentioned the other day that independent pattern designers are becoming very popular, especially with the kids’ clothing set. I happen to agree with this. The patterns are generally reasonably priced (though not as cheap as when I buy my paper patterns on sale for a dollar) and most have the added benefit of being an instant download pdf. Who doesn’t love instant gratification?

    One of my absolute favorite independent designers is Jen over at Tie Dye Diva Patterns. Her patterns are impeccably drafted, and her instructions are always crystal clear. Even better, she has a very active Facebook community page, so if you do have a question, you can ask her directly.

    While most commercial paper patterns are printed on large (36″x48″) pieces of paper, most instant download patterns are designed to be printed on standard letter size paper and taped together. All you have to do is print and assemble them, then cut whatever size you need. I’ve read a tip about using tissue paper to trace the size you need, but I haven’t gotten around to giving that a try yet.

    IMG_7619

    Finding Nemo? More like Found Nemo.

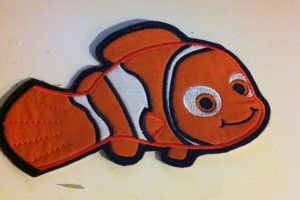
    When Sue told me Emma was having a Finding Nemo themed birthday party, I offered to make a dress. Unfortunately, Nemo fabric is hard to come by. I was able to find a really cute Nemo applique from The Enchanted Hollow on Etsy.

    IMG_3432

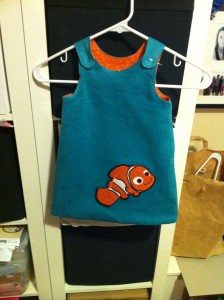
    When it arrived, I was delighted with the quality, but was a little concerned about the size. There were several size choices available, and I thought maybe I had gone a little crazy and gotten one a bit too big. I got over that and decided it would work well on one of the Tie Dye Diva “Perfect A-line” dresses. I found a cute teal corduroy with silver sparkle. The lining (though actually, the dress is designed to be reversible) is an orange print. I put the Nemo applique down the bottom. The simplicity of the dress and the solid colored fabric were perfect to go with the somewhat over-sized applique.

    IMG_3561

    All I had to do was add a couple of orange buttons and it was all set for Little One’s birthday. She loved her dress and just kept pointing at the applique and exclaiming “Nemo!” That’s what makes sewing for the kidlets so much fun.

    NemoDress

    “Nemo, Nemo, Nemo, Nemo, Nemo!”


  4. Carrot Pineapple Cake

    November 13, 2013 by Daniora

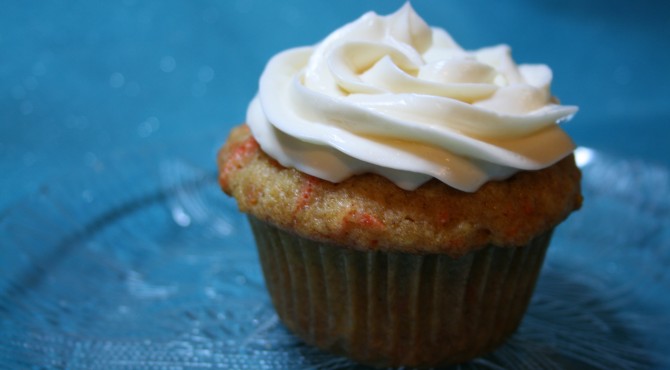
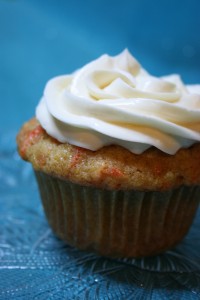
    FinishedCupcake

    Guys, I’m not exaggerating here when I tell you that this is the most delicious carrot cake you will ever eat. That’s not hyperbole, it’s just the honest truth.

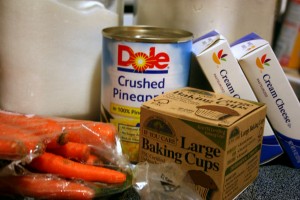
    Preview

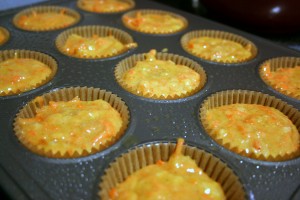
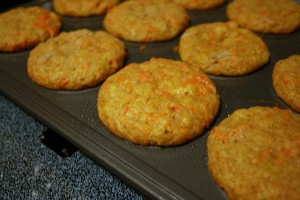
    The original recipe is designed to be  bundt cake with a vanilla glaze. It also works perfectly well as cupcakes with cream cheese frosting. The baking instructions below are for the bundt cake. For cupcakes, I cook them for about 25 minutes, rotating halfway through. (You do rotate your pans while you’re baking, right? Good.) I was worried that they were taking so long to cook, but I fill my cupcakes pretty full and this particular batter just takes a while to cook. Keep an eye on them; better to check on them more often than have them burn.

    ReadyfortheOven

    Some people like nuts or raisins in their carrot cake. While that may not be my personal preference, it’s easy to add them to this recipe; just mix them in at the end. I like to add about a quarter teaspoon of cloves in addition to the nutmeg and cinnamon. Cloves are my favorite spice, and they give it a warm sweetness.

    CupcakeTray

    I’m serious, though. This is the best. If you enjoy carrot cake even a little, you owe it to yourself to bake these (or get someone else to bake them for you).

    SoloCupcake

    Carrot Pineapple Cake

    • 3 cups all purpose flour
    • 2 cups sugar
    • 1 teaspoon baking powder
    • 1 teaspoon baking soda
    • 1 teaspoon salt
    • 1 teaspoon nutmeg
    • 1 teaspoon cinnamon
    • 3 eggs, beaten
    • 1-1/4 cups cooking oil
    • 2 teaspoons vanilla
    • 1 cup (8.5 oz can ) crushed pineapple, undrained
    • 2 cups grated raw carrots, loosely packed
    1. Preheat oven to 325. Grease bundt pan.
    2. Mix together flour, sugar. baking powder, baking soda, salt, nutmeg and cinnamon in a large bowl.
    3. Make a well in the center of the dry ingredients and add eggs, oil and vanilla. Blend thoroughly.
    4. Stir in undrained pineapple. Add carrots and pecans. pour into prepared bundt pan.
    5. Bake for 1 to 1-1/4 hours until cake tests done.
    6. Cool 10 minutes in pan, then turn out and finish cooling on wire rack. Add vanilla glaze.

    Vanilla Glaze

    • 1 cup sifted confectioner’s sugar
    • 1 tablespoon milk plus 1/4 teaspoon vanilla
    • 1 tablespoon light corn syrup
    1. Combine all ingredients and beat until smooth. Use spatula or large spoon to put glaze on top of cooled cake. Spread around top of cake with a knife. Glaze should run down sides slowly.

    Cream Cheese Frosting

    • 16 ounces cream cheese, room temperature
    • 1 cup confectioners’ sugar
    • 2 teaspoons pure vanilla extract
    1. Put cream cheese into the bowl of an electric mixer fitted with the paddle attachment. Mix on medium-high speed until smooth. Reduce speed to medium-low, and mix in sugar and vanilla. Raise speed to medium-high, and mix until fluffy, 5 to 7 minutes.

  5. My Autumn Wreath

    November 12, 2013 by Daniora

    IMG_7624

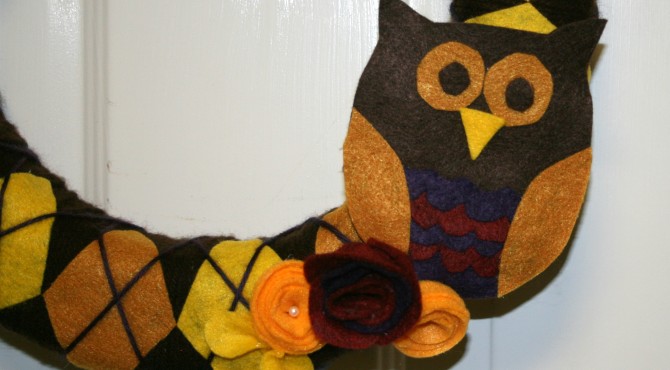
    Apologies for the fuzzy iPhone photos. In my determination to get this project completed, I neglected to photograph it as well as I should have.

    Since my Halloween wreath is still sitting about 90% finished next to my crafting table, I was determined to get my Thanksgiving one up in a more timely manner.

    I wanted something autumnal but not specifically Thanksgiving. I needed something that I could put up for more than a few weeks.  I went browsing around the web and found this precious yarn and felt argyle wreath on Etsy. In my typical fashion, I thought “Hey, I can make that.”

    Let me start by saying that I don’t think I’ll be making another yarn wrapped wreath any time soon. It. Took. Ages.

    ArgyleWreath

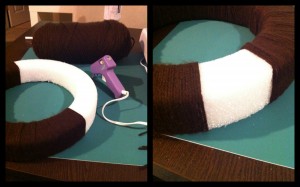
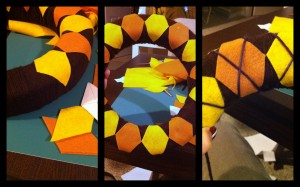
    The difficulty was compounded by the fact that I used a flat ring wreath form instead of a round one. So I’d be going along, wrapping the yarn nicely and then realize that, because the outer circumference is larger than the inner one, that my wrapping was no longer straight. So then I’d have to do this weird wedge backtrack wrapping thing to try and straighten it back out again. Nonsense.

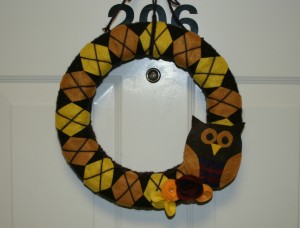
    Once I got the wreath form wrapped, it was time to put the argyle pattern together. I measured out a diamond that I thought would look good and started cutting them out of the two colors of felt. I wasn’t worried about filling the entire space since I was making my little felt owl who would cover any gap in the pattern.  Once the diamonds were glued down, I used a dark purple yarn to crisscross over them completing the argyle.

    ArgyleWreath1Then it was on to the decorations. I found a pattern for a felt owl over at Bugs and Fishes. He went together pretty fast. Then it was just a matter of putting together a few quick felt flowers (another tutorial I’ll have to do in the future) and viola! A wreath. On my door. In time for the holiday!

    How shiny is the paint on our door? Holy cow

    How shiny is the paint on our door? Holy cow.

    Wreaths are one of those things I have come to love about having a place of our own. Wreaths and door mats. The rest of the house may be a disaster a lot of the time, but my front door is always inviting.


  6. Maraschino cherries, version one

    November 7, 2013 by Daniora

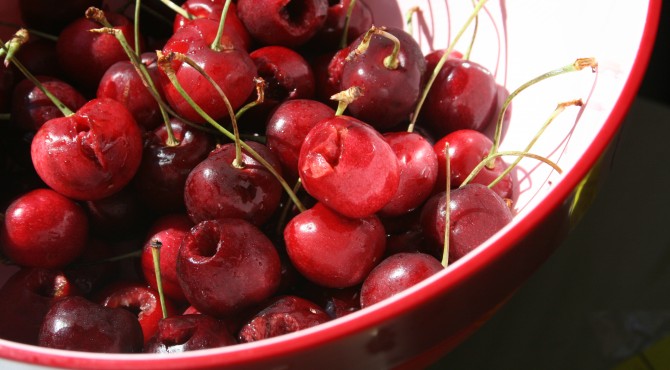
    Fresh Cherries


    I do not like maraschino cherries.

    This is a fact. I used to pick them out of my Shirley Temples, offer the ones off my ice cream sundaes to anyone that wanted them, and sipped around them in my girlie cocktails. Well, it turns out that I don’t like commercially made maraschino cherries.

    Cherries

    Making your own maraschino cherries is a fair amount of work. Fresh cherries can be pricy, and they all need to be washed and pitted (messy work). Then they have to be cooked with a variety of ingredients, including pomegranate juice (also pricy) and fresh orange zest. Then once you’ve got these cherries all cooked, you have to put them in jars and into the fridge for three days.  As if that weren’t enough, with no preservatives, they won’t stay fresh for long. This seems like an awful lot of trouble for something that can cheaply and easily be bought in a jar. I mean, how bad could they be?

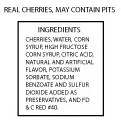
    Cherry Label

    Oh.

    Okay, then. Homemade maraschino cherries it is! In a discussion with a group of friends, we decided that calories from miniature foods don’t count. I countered that I make things from scratch for that same reason; it might not be good for me, but it’s way better than if it were commercially made. For some foods, like these cherries, this is especially true.

    Real maraschino cherries are made by soaking cherries in maraschino liqueur. Who knew? However, most of my goodies tend to be enjoyed by small children, so for most applications, those cherries are not the ones that I need.

    This version of cherries is alcohol free, and I think very tasty. You can add red food coloring to make them look more like store bought, but I have a real distaste for artificial colors. Cherries are red enough on their own.

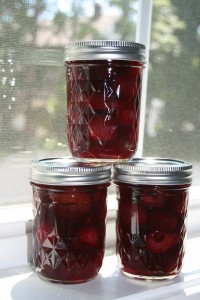
    Finished Product

    Homemade Maraschino Cherries (adapted from the recipe from Cupcake Project)

    Ingredients

    • 1 1/2 cups water
    • 1/2 cup pomegranate juice
    • 1 cup sugar
    • 3 1/2 fluid ounces lemon juice (juice from about 3 lemons)
    • pinch of salt
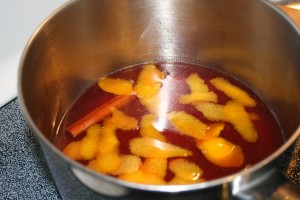
    • Peel from one large orange
    • 1 cinnamon stick
    • 1 pound pitted cherries (invest in a cherry pitter, and don’t wear white)Syrup
    • In a medium-sized saucepan over medium-high heat, add everything except the cherries.
    • Bring to a boil.
    • Reduce the heat and simmer until the sugar has dissolved, stirring periodically.
    • Add the cherries.
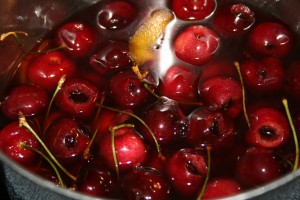
    • Simmer on low heat for 10 minutes or until the syrup has a bit of a cherry flavor. You don’t want to cook the cherries – you just want to bring out some of their flavor. However, I can attest that cooking the cherries really doesn’t hurt. They just turn out a little softer.
    • Remove the pan from the heat and transfer the entire contents to a bowl (so it doesn’t continue cooking).
    • Let cool to room temperature.
    • Transfer to an air-tight container, like glass jars, and refrigerate.
    • Let the flavors develop for about three days, then enjoy!

    Waiting the three days for the cherries to be ready is tough. Of course, they taste pretty darn good straight from the pan too.  The syrup is delicious. I’ve made homemade grenadine as well, but the syrup from the cherries would be just as good for making a mean Shirley Temple. These are absolutely worth the effort, and you will never buy a jar of scary cherries again.


  7. Auntie’s Fairies: A pattern review

    November 5, 2013 by Daniora

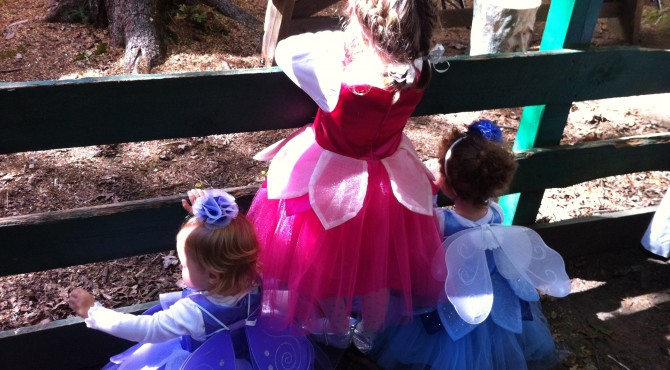
    Little ladies

    There are a couple of highlight events that we participate in every year. One of them is PAX East, in the spring. The other is King Richard’s Faire, every fall in Carver. The Faire is like my costume Olympics. This year was pretty tame; I only made two and a cloak. Last year I had 8!! costumes that I made. So far next year is already looking like it’ll be another big year.

    One of the problems I run into with doing a lot of costumes for the little ones is that I can’t start them too far in advance; I’ve run into problems with them sprouting up in the time between when I take their measurements and when the Faire happens. As a result, I have to find patterns that are quick, easy, and reliable.

    There’s been a lot of backlash lately in some of my online sewing groups against the big pattern companies (Simplicity, McCalls, Butterick, Vogue) in favor of independent designers. I’m all for supporting small business and independent artists. They are fantastic. I’ve also run into some less than stellar patterns from the big companies. For now, though, finding the costume pieces I need from a small designer is tough to do, and I haven’t quite reached the level where drafting my own patterns is practical. So I keep buying the big patterns when they go on sale for a dollar or two and, as my husband can tell you, I’ve created quite a collection.

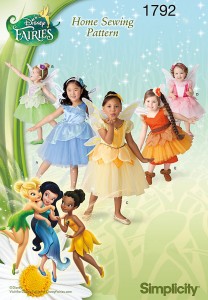
    One of my absolute favorites is Simplicity 1792: The Disney Fairies.

    1792

    Simplicity 1792: Toddlers’ and Child’s Disney Fairies Costume Sewing Pattern

    For the last two years, Auntie Mimi’s little girls have been pretty, poofy fairies. These costumes are a delight to sew and are so adorable. The fabric requirements are fairly minimal, which means that you can splurge a bit and get some of the fancier special occasion fabrics to make your fairy a little extra sparkly.

    Because it gets a little chilly here in New England in the fall, they usually wear long sleeves and tights under their dresses, but it doesn’t take away from the cute factor of these costumes.

    My favorite part about making these is putting together the tulle layers. It’s a little tricky and you wind up with a circle about 6 yards in circumference that gets gathered down to a little 20 inch waist. It’s crazy. Since the skirt is so full, it bounces and sways as the little ones run around. They always turn heads, especially in a group (It helps that they are completely adorable little girls).

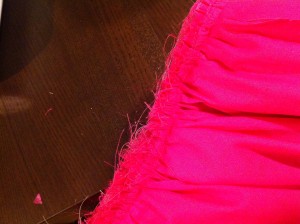
    I will say that having a serger definitely comes in handy for this pattern. The waist is made up of the bodice, two layers of petals, two layers of tulle, and a cotton lining. This can get a little… out of hand.

    IMG_3258

    So many layers and loose threads.

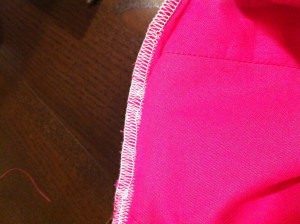
    However, one quick pass on the serger and everything is all neat and tidy. This is even more important since a lot of the costume and special occasion fabrics that make a fairy sparkle and shimmer have a tendency to fray pretty badly. Plus, a nice finished edge is much more comfortable for little ones to wear.

    IMG_3259

    Neat and tidy!

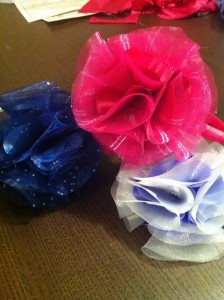
    For that little something extra, I whipped up some double layer fabric flowers. Two of my little ones got headbands, one got a hair clip. I’ll do a tutorial on them soon, since they were so fast to make and created such a big impact.

    IMG_3267

    I think I could dress my little ladies up as fairies forever. Watching them dance around and run through the trees, it’s hard not to believe in magic.


  8. Ava’s Hello Kitty Birthday

    November 2, 2013 by Daniora

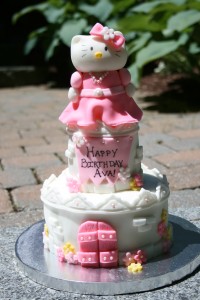
    Kitty with a sugar pearl necklace.

    Are we glossing over the fact that I haven’t posted anything in over a year and a half? Yes, yes we are.

    My little buddy Ava turned 4 this spring. She wanted to have a Hello Kitty themed birthday. She asked her mom if Auntie Mimi would make her a Hello Kitty cake. Of course Auntie Mimi would make her a Hello Kitty cake.

    IMG_7239

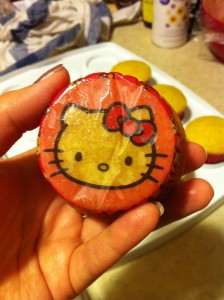
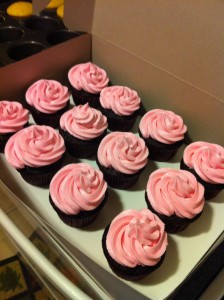
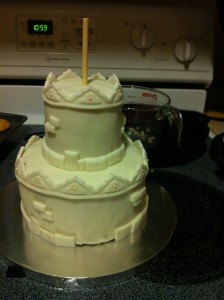
    Since Ava is our little princess, a castle cake seemed to be the right answer. My girl loves pink too, obviously. Since there were going to be a whole bunch of people there, I went ahead and made some Hello Kitty cupcakes to go with it.

    Picture 433Picture 432

    While I’m not the biggest fan of Wilton’s fondant (the taste, mostly), there were two Wilton products that I fell in LOVE with.

    The first is one of their silicone fondant press molds (I used the global one). They’re super easy to use and make really beautiful impressions. All I did was loosely press a piece of fondant into the mold, then used a small plastic rolling pin to roll it flat into the mold. Once the excess fondant had been rolled out, I could just peel the pieces out of the mold and trim around the edges. Simple!

    Castle

    The basic castle shape. You can really see the details from the fondant mold.

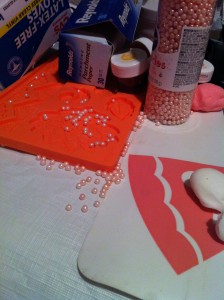
    The other are their sugar pearls. They come in a variety of soft colors (I got pink, of course). They were the perfect flower centers and accents to my fondant pieces. I just pressed them into the fondant while it was still soft, and they stuck perfectly. A word of caution. They are roly poly and will get away from you if you let them.

    Perfect centers for flowers

    Perfect centers for flowers

    Picture 429

    Sugar pearls….. everywhere.

    Kitty with a sugar pearl necklace.

    Kitty with a sugar pearl necklace.


    In addition to the cake, because that’s never enough, I made a party dress for Ava.

    Ava's Party Dress

    Pretty in pink.

    It was my first time using the pre-smocked fabric. It was really super simple, but I don’t know that I’d do it again. It sort of feels like cheating. It’s really only one seam and sewing on the straps. It’s also fairly pricey, running around $0.50 an inch (I know that doesn’t sound like much, but it comes out to $18 a yard!) It did turn out pretty cute, though.  Of course, the attitude sells it.

    Attitude for days!

    Attitude for days!

    I love doing stuff for the kids’ birthdays. Any excuse for a celebration.