RSS Feed

‘Crafts’ Category

  1. Space traveller baby quilt

    July 11, 2011 by Daniora

    It’s time again for another baby quilt!

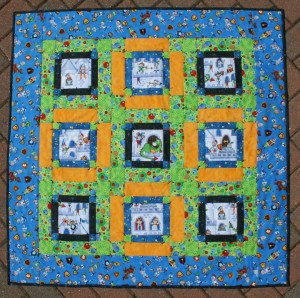
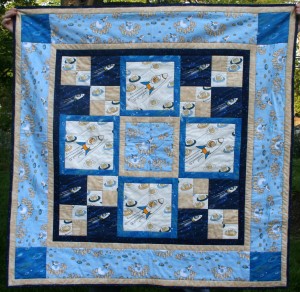
    In spite of appearances, this quilt is actually square.

    This one was really special to me for a few reasons.

    1. It’s my first commissioned quilt.
    2. It’s the first quilt that I designed from scratch, without using a pattern.
    3. It’s the first quilt that I’ve ever machine quilted.


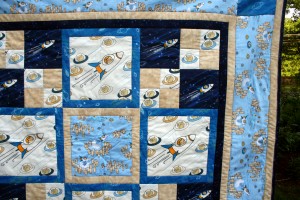
    Quilt Detail

    Close up of one of the corners.

    My good friend Erik asked if I could make a baby quilt for a friend of his. He originally wanted a Star Wars themed quilt.  I had thought this would be no problem, until I actually went looking for Star Wars fabric.  For a while after the prequels came out, there were a fair number of different officially licensed fabrics to be found.

    Unfortunately, by now they’re long gone.

    My only option would have been to use the sheets sold by Potter Barn Kids, and that was entirely cost prohibitive and would only yield one fabric.  With the basic feel in mind, I went off to the fabric store. That’s where I came across the “Marty Goes to Mars” fabric line by Camelot Cottons.

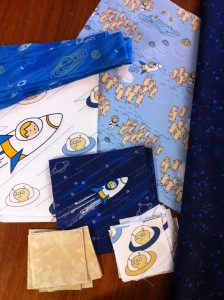
    Fabrics

    My selection of fabrics.

    Because I went into the store with no idea what I was going to wind up making, I really didn’t know how much of each fabric to get. I got some of each of them in varying amounts based mostly on how much I liked them. When I got home, I did check out a few books to see how other quilts handled using a big novelty prints like the ones I had just bought. In the end, I took ideas from a few of them and worked them into my own design.

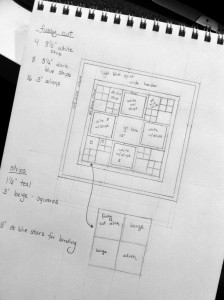
    Design sketch

    My initial design sketch.

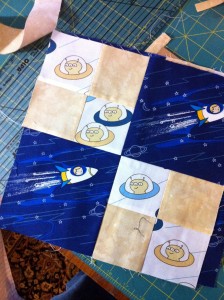
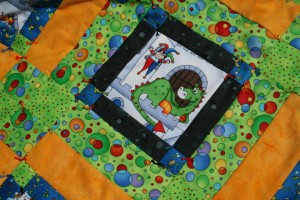
    Quilt Square

    One of the squares.

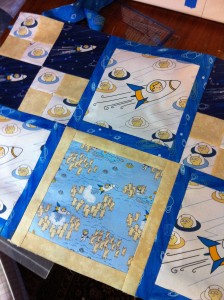
    In Progress

    The quilt top in progress.

    Once the top went together, I was ready to quilt*. All my previous quilts had been hand tied rather than quilted. It’s a somewhat easier technique, but a tied quilt can fall apart with heavier use. For these quilts intended for babies and small children, something a bit hardier is better. I was pretty nervous, especially since this would be my first quilting experience and the quilt was for someone else. In the end, I was really pleasantly surprised with how well it all went. I found a variegated thread in shades of blue to do the quilting in. I mostly stuck to stitching in the seams, but for some of the larger squares, I had to add extra stitches for stability.

    Because this was my first machine quilting attempt, I wanted to stick with straight lines.  So, I chose to accent some of the speed lines on the space ship squares and I quilted a large star in the center square. I was really pleased with how it turned out. It felt really well put together and sturdy. The fabrics were adorable and I loved putting them together.

     *For my readers who are not familiar with how a quilt goes together, let me give a brief explanation. A quilt is made up of three layers: the top, the batting (the squishy stuff in the middle) and the back.  You have to secure these layers together at regular intervals or the batting would wind up tearing and become all bunched up in one part of the quilt. There are two different ways to do this. Tying involves making little knots every few inches with embroidery floss.  Quilting is using strong cotton thread to sew lines of very small stitches. These lines can be different distances apart depending on the type of batting used. Quilting can be done either by hand or on a machine.
  2. Jelly Roll Baby Quilt

    May 4, 2011 by Daniora

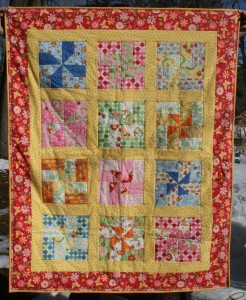
    Last August, some friends of ours had a precious little girl named Ainsley.  About 2 months before she was born, I started working on a quilt for her.  I got behind on some stuff, and decided to save it for Christmas.  When Christmas rolled around, I was again really busy and didn’t finish the quilt.  It’s finally finished and has been sent off to them.

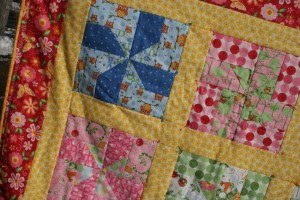
    Deatil of quilt blocks

    It’s my first quilt using a jelly roll.  For those not in the know, a jelly roll is a collection of 2 1/2″ strips of coordinating fabrics.  Moda makes some of my favorite fabrics, and their jelly rolls are a good (and affordable) way to get a sampling of them. In addition to not having to cut the fabrics, there are a lot of free patterns using jelly rolls to choose from.  I used this Whirly Wheels Baby Quilt pattern from the Moda bake shop. The only change I made was that I only used 12 squares instead of 20.Jelly roll baby quilt

    I loved this pattern since the last few quilts I had done had been relatively simple, and I was looking for something that was a bit more challenging. This was also the first quilt I made with my brand new sewing machine.  A few of the squares turned out a little lopsided while I was getting used to the new equipment.

    Edge stitches

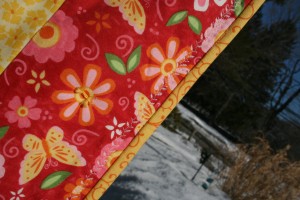
    As a little added detail, I put a decorative stitch all along the border.  This took ages (and tons of thread) but I think it really adds a cute touch. It also manages to catch the binding on the back that was a little uneven. This quilt had a lot more steps and took a bit longer, but I think the end result was really fantastic.


  3. Needle Felting

    April 26, 2011 by Daniora

    I believe that the first time I ever saw anything needle felted was on an episode of the Martha Stewart show.  It looked so simple and fun, and I was completely taken in by the old “here’s one I prepared earlier” trick.  This is definitely something I’ve wanted to try for a while.

    Things are never as easy as they seem on tv.  As far as this craft goes, however, it’s not all that far off.  It’s certainly going to take a bit of practice to get things right, but I think that my first attempts have turned out better than expected.

    The art of needle felting involves taking bits of unspun wool roving, making it into shapes, and repeatedly stabbing it with a special needle.  The needle has little barbs along the edges that help tangle the fibers together into one felted piece. I shudder to think what would happen if you stabbed yourself with said needle. In order to build a 3d felted object, you make multiple pieces and join them together (with more stabbing) and add details with tiny bits of roving.  It’s really very entertaining and the repeated stabbing is quite relaxing.

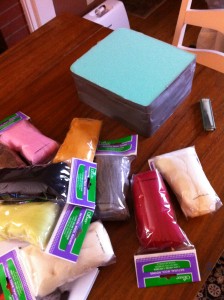
    For this first attempt I had a book in hand, but I’ll admit that I didn’t really read the instructions.  I mostly looked at the pictures for guidance.  Secondly, we had a bit of a hard time finding the supplies at any of our local stores.  There are certainly plenty of online retailers who will set you up with everything you need to begin needle felting, but for those of us seeking instant gratification, things are a bit trickier.  I did try my local yarn and fiber store.  While they had plenty of wonderful things, they did not have the supplies I was looking for.  We eventually found everything we needed at a Joann Fabrics.

    Needle felting supplies

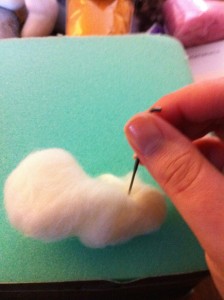
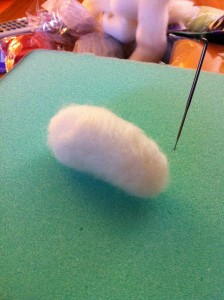
    Supplies in hand, I set up shop at the table and started working on what would eventually turn out to be a sheep. Actually, I started out hoping to make a rabbit, but after I completed the body portion I realized that it looked nothing like a rabbit. It did, however, look somewhat like the body of a sheep.  I went along with it. Keeping the roving in the shape you want is really tricky in the beginning.  It’s very soft and silky and can get out of hand quickly.  The other problem I had was tucking in the ends of the pieces of roving. They kept sticking out at crazy angles and were tricky to catch with the needle.

    Beginning the needle felting process

    Beginning the needle felting process.

    This looks nothing like a rabbit.

    This looks nothing like a rabbit.

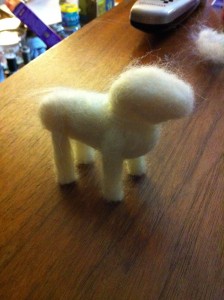
    Looking more like a sheep.

    Looking more and more like a sheep.


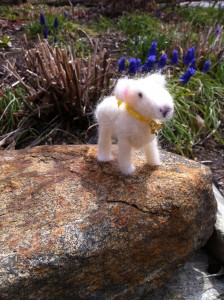
    Getting the legs right was the hardest part.  You’re working with a pretty small amount of roving, trying to make it as stable as possible while also trying desperately not to stab your fingers with the needle.  In the end, I wound up making two long pieces that were pretty firm in the middle and cutting it in half.  The other tricky part is making sure that you don’t over felt before you join pieces together.  There has to be some loose fibers on one section that you can felt into the other. Once I got all the main pieces together, I added the smaller parts like ears and a tail.  For a finishing touch, I sewed seed beads on for eyes and added a small bell with a ribbon.  I have to say, I’m really pleased with the finished product.

    The finished wool lamb.

    The finished wool lamb.

    As I said, I’m really excited to have gotten such a good result on a first try. I’m looking forward to playing with this stuff a bit more.  If you want to check out some pretty awesome and non-traditional needle felted projects, check out this page on Deviant art.  Crazy good. (And thanks to Jo for the link!)


  4. Ukrainian Easter Eggs

    April 13, 2011 by Daniora

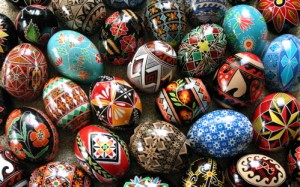
    Each year when Easter approaches, I get it into my head that I am going to make Ukrainian eggs (otherwise known as pysanky).

    A collection of Ukranian EggsFor those not in the know, Ukrainian eggs are made by meticulously covering the part of the design on an egg that you wish to remain white with beeswax, then dipping it in dye (usually yellow is first).  Then parts of the design that are to remain yellow are masked off with wax and the egg is dipped in the next color.  This continues with progressively darker dye colors until the final dip in black dye. After all the colors have been dyed, the wax is melted off over a candle to reveal the completed design.

    There is a tremendously steep learning curve here, not only because of the technique of using the kistka to apply the wax is a little tricky, but also because you have to have planned your design out completely before you even start.  This is the part I’ve never been good at.  I’m always very eager to get started, but I never have a plan.

    Wikipedia has a really good description of traditional pysanky motifs and color meanings.  It’s a pretty good place to start when designing eggs of your own.  Flickr also has a very large group devoted to Ukrainian eggs with some really beautiful examples. If you want to give this a try for yourself, there are plenty of places where you can pick up supplies. PysankyUSA has an exhaustive selection of tools and supplies, along with kits so you can get started right away. In terms of instruction, I really like LearnPysanky.com. The woman who writes it clearly has a passion for the art form.  She’s got links to where you can buy supplies, helpful hints, and even where some workshops are being held.

    Because of the amount of work that goes into creating one of these eggs, you’ll want to blow out the insides so that they can be kept from year to year.  I’ve seen artists do this after the design is completed which seems absolutely crazy to me. I would hate to put in all that work only to have the egg crack while trying to empty it out.  You can also purchase already blown eggs of all sizes, from quail to ostrich.  The only tricky part about working with already blown eggs is that you’ll have to cover the holes with wax to prevent them from filling up with dye.

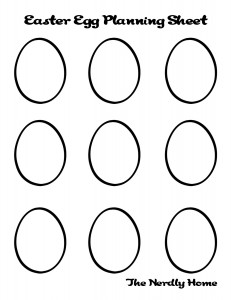
    Egg Design WorksheetWhether you’re going to try your hand at making these beautiful Ukrainian eggs or if you’ll be decorating some other way, I’ve made up a little egg design sheet so you can plan your eggs ahead.  Maybe, just maybe, this will be the year when the stars align and I actually put wax to egg to try this out for myself.


  5. Nerdly baby quilts

    April 11, 2011 by Daniora

    These quilts appeared in a post on my other blog, but I thought they’d fit very well here.

    There has been a bit of a baby boom in my group of friends.  There are now six children three years old or younger.  As a result, I’ve been making a lot of baby quilts.


    It’s hard to believe that the twins I made these quilts for are almost a year old. Usually these baby quilts come one at a time. I usually prefer patterns that are a little complicated to hold my interest.  In this case, I had to make two at once.  Since the father is a big D&D and Warcraft player, I wanted to make sure that the quilts had a nerdy vibe to them. I had to balance making them different from each other but still make production easy enough to make two at once. In the end I opted to use the same pattern but with different fabrics.

    The first was based around a fantastic fabric I found with a large print of knights and dragons in a castle.  I fussy cut the center squares and pulled coordinating fabrics for the borders.

    I wasn’t sure about using black on a baby quilt.  However, it really made the outlines in the large print pop. Without it, the entire quilt would have looked pretty flat.   My only regret on this one is that the two green prints are a bit too close in color and design.  From far away, they really blend together.

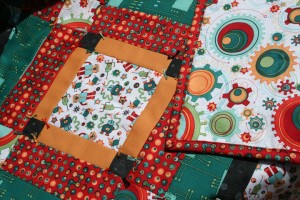
    The second quilt was based around a set of robot and gear fabrics that I’ve loved for a long time.  I had bought a set of fat quarters a few years ago just because I thought they were so adorable.

    The great thing about these fabrics is that the colors are so different from what you typically see in baby quilts.  That made color matching a bit more difficult, but there were quite a few coordinating fabrics available.

    Both quilts were hand tied; machine quilting is still something that I find a bit intimidating.  I’m hoping to work on that for the next quilt I do.  I think it will go a lot faster and hold up a lot better in the long run.

    The boys love their blankets, and at least one of them is always on hand at all times.  With their first birthday coming up at the beginning of next month, I’m not sure how I’ll be able to top myself on this one.