RSS Feed

July, 2011

  1. Carrot Cake Jam

    July 26, 2011 by Daniora

    Carrot Cake Jam

    I recently picked up a special issue from Better Homes and Gardens all about canning. It has tons of recipes for jams, preserves, and pickles. Every group of fruits and vegetables are represented, and there are even two full pages of recipes for dealing with your surplus zucchini. The issue will be available until August 9th, so I recommend picking up a copy.

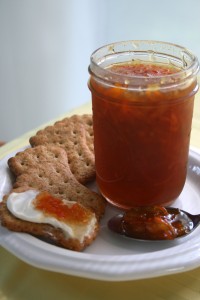
    The first recipe I tried out of this new resource was for carrot cake jam. They recommend serving it on toast with a bit of cream cheese (since real carrot cake generally has cream cheese frosting). I’ve been having it on crackers, and it’s fantastic. I will say one thing about it; it’s extremely sweet. This is a jam to be used sparingly, not slathered heavily on your morning English muffin.

    Because this recipe has a pretty high yield, I wound up getting myself an actual canning pot. It can process up to eight half pint jars at a time. The one problem with this is that our kitchen is currently plagued by a particularly small stove. As a result, the canning pot and the dutch oven I use to cook the jam do not fit on the burners at the same time. This made sterilizing and warming the jars while keeping the jam hot a tricky feat. I also happened to pick a 90° day to test out this new recipe. Between the bubbling jam and the steaming canning pot, it was not a comfortable experience. However, the end result was totally worth it.

    I think the one flaw in this attempt at jam making was that I didn’t cook it quite long enough. In spite of having fantastic instructions on how to check to see if the jam is done, I completely ignored them and went purely on the cooking times given in the recipe. As a result, the jam isn’t quite as firm as it is supposed to be.This is also the first jam I’ve made using pectin, so I wasn’t entirely sure how precisely I had to adhere to the cooking times. Next time I’ll be sure to check how gelled it is before putting it in the jars.

    The recipe yields seven half pint jars, so I’ve been handing jars out to my friends and family. They have been universally well received. I’m looking forward to using it as the jam for a batch of thumbprint cookies.


  2. Planting Potatoes: Part 3

    July 13, 2011 by Daniora

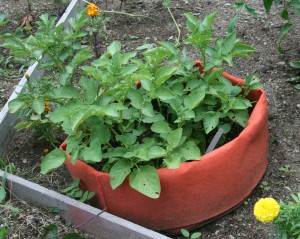
    I will admit, the potatoes got away from me a bit.

    Potatoes Before

    Leafy!

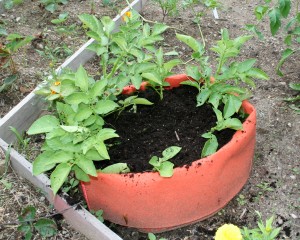
    We had a few good weeks with the perfect mix of rain and sun and the plants just took off. So the time has come to add my first batch of dirt. For this round, I just added another few inches of soil on top of what was already there. For the next addition, I’ll be folding the top of the grow bag back up.

    Potatoes After

    All snuggled up in their new layer of dirt.

    The plants look great. There’s one that’s fallen behind a bit in height, and I’m kind of hoping he’ll catch up before I add more soil.

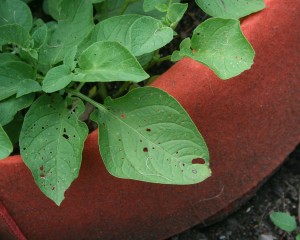
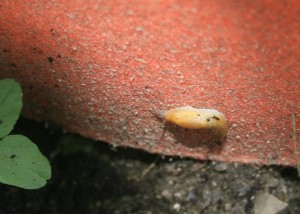
    The plants look really healthy, so I’m hopeful that I’ll be able to get a good harvest out of this little bag. I’ve been worried about the potential for bugs. Fortunately, I’ve been pretty lucky. There are some little nibbles taken out of the leaves, but no visible pests. Well, except one little slug hanging out on the side of the bag.

    Tiny bites

    Tiny bites, no pests.

    Slug

    An Unwelcomed Guest

    I’m hoping to get the next layer of soil put in the beginning of next week. I probably won’t do a full write up, but I’ll be sure to put up a quick post with a few pictures.


  3. Space traveller baby quilt

    July 11, 2011 by Daniora

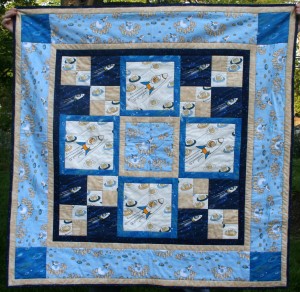
    It’s time again for another baby quilt!

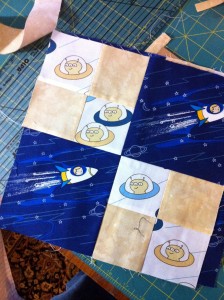
    In spite of appearances, this quilt is actually square.

    This one was really special to me for a few reasons.

    1. It’s my first commissioned quilt.
    2. It’s the first quilt that I designed from scratch, without using a pattern.
    3. It’s the first quilt that I’ve ever machine quilted.


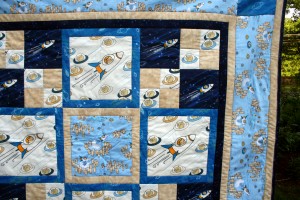
    Quilt Detail

    Close up of one of the corners.

    My good friend Erik asked if I could make a baby quilt for a friend of his. He originally wanted a Star Wars themed quilt.  I had thought this would be no problem, until I actually went looking for Star Wars fabric.  For a while after the prequels came out, there were a fair number of different officially licensed fabrics to be found.

    Unfortunately, by now they’re long gone.

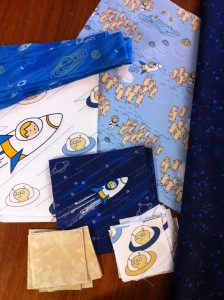
    My only option would have been to use the sheets sold by Potter Barn Kids, and that was entirely cost prohibitive and would only yield one fabric.  With the basic feel in mind, I went off to the fabric store. That’s where I came across the “Marty Goes to Mars” fabric line by Camelot Cottons.

    Fabrics

    My selection of fabrics.

    Because I went into the store with no idea what I was going to wind up making, I really didn’t know how much of each fabric to get. I got some of each of them in varying amounts based mostly on how much I liked them. When I got home, I did check out a few books to see how other quilts handled using a big novelty prints like the ones I had just bought. In the end, I took ideas from a few of them and worked them into my own design.

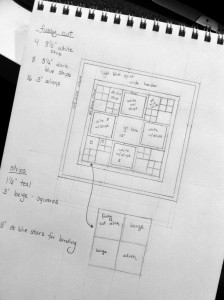
    Design sketch

    My initial design sketch.

    Quilt Square

    One of the squares.

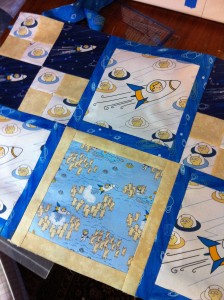
    In Progress

    The quilt top in progress.

    Once the top went together, I was ready to quilt*. All my previous quilts had been hand tied rather than quilted. It’s a somewhat easier technique, but a tied quilt can fall apart with heavier use. For these quilts intended for babies and small children, something a bit hardier is better. I was pretty nervous, especially since this would be my first quilting experience and the quilt was for someone else. In the end, I was really pleasantly surprised with how well it all went. I found a variegated thread in shades of blue to do the quilting in. I mostly stuck to stitching in the seams, but for some of the larger squares, I had to add extra stitches for stability.

    Because this was my first machine quilting attempt, I wanted to stick with straight lines.  So, I chose to accent some of the speed lines on the space ship squares and I quilted a large star in the center square. I was really pleased with how it turned out. It felt really well put together and sturdy. The fabrics were adorable and I loved putting them together.

     *For my readers who are not familiar with how a quilt goes together, let me give a brief explanation. A quilt is made up of three layers: the top, the batting (the squishy stuff in the middle) and the back.  You have to secure these layers together at regular intervals or the batting would wind up tearing and become all bunched up in one part of the quilt. There are two different ways to do this. Tying involves making little knots every few inches with embroidery floss.  Quilting is using strong cotton thread to sew lines of very small stitches. These lines can be different distances apart depending on the type of batting used. Quilting can be done either by hand or on a machine.


  4. Documenting your family vacation

    July 8, 2011 by Daniora

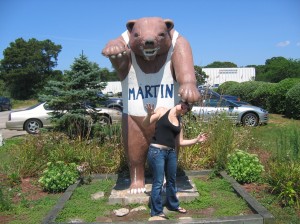
    Me and Martin the Bear on the Cape

    Me and Martin the Bear on the Cape, 2006

    There’s something to be said about the old way of dropping off a roll of film when you got back from a family vacation.  By the time you finished unpacking, the prints would be ready and you could relive the fun times of your trip all over again. The prints were then put into a photo album (doubles and embarrassing photos were hidden behind other pictures) and could be enjoyed at any time.

    The digital photography revolution has certainly done a lot of positive things for vacation photography.  First of all, there’s no need to worry about the cost of developing and printing all those pictures.  You’re free to snap away as long as the memory cards hold out.  Also, you don’t have the problem of picking up a set of prints only to discover that you’d forgotten to turn the flash on. You’ve got instant access to the photos you’ve taken, and it is much simpler to send those pictures to Grandma, often before you even get home. However, after the trip is through, more likely than not the digital files get relegated to a corner of the hard drive, never to be seen again.

    This should not be!

    There are plenty of awesome things you can do with your digital vacation photos, many of which don’t cost a penny. You certainly can handle your digital photos like film photos and order prints for the album or upload them to Flicr or your favorite social networking site, but there are lots of other options available too.

    Picasa
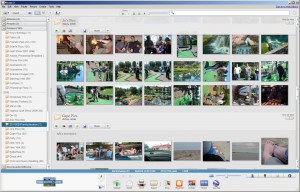
    Picasa Screenshot

    There may be no better photo organizing and tweaking software out there than Picasa.  It’s a Google program and is completely free to download.  It allows you to choose which folders it will always scan to look for new photos.  It has an easy to navigate interface that displays folders chronologically.  It has plenty of features for fixing your images, like straightening or adjusting contrast.  You can even add blur or film grain effects, or make your photos black and white or sepia toned. It is certainly not as full featured as a program like Photoshop is, but for the average user trying to organize and pretty up their snapshots, this is the perfect tool.

    One of the other great features of Picasa is that it shows if the file has geotag information, a security concern for some, and allows you to scrub that data in one easy step. Or, if you are a fan of geotagging your photos, you can also view a map of where all your pictures were taken. Once you’ve finished tweaking your pictures, you can then upload them to a Picasa album, make a collage, movie, or gift CD or even order prints from a number of providers.

    MapHook
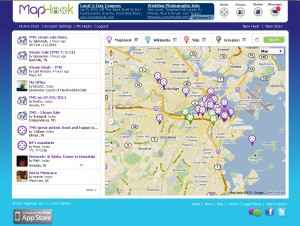
    MapHook Screenshot

    MapHook is a fantastic service available through the web or as an app on your iOS device (and coming soon to Android). You create a post, or Hook, with information on where you are and what you’re doing.  The GPS chip in your phone will pinpoint your location on a map, or you can adjust your location manually.  You can upload pictures to go along with your Hook.  When you’ve finished, you can choose a category for your Hooks and even pick a group to share them with.

    Once you’ve got a bunch of Hooks from your trip, MapHook gives you the ability to link them all together into a story.  It’s a really fantastic way to put all your pictures and description of what you’re doing into one place.  You can even create a private group, say your family, and post your Hooks so they will only be visible to those people.  It would be a great way for everyone to document an event, like a family reunion, from their perspective. Imagine each family group making Hooks of their travels to wherever the reunion is and then documenting everything that goes on at the event. No matter how hard you try, you’re bound to miss taking a photo of some part of a big event, especially when there are  a lot of people. By combining all your Hooks into a story and publishing them to a group, everyone is able to share their photos and memories with everyone else.

    Another handy MapHook feature is being able to browse Hooks that are near your location. If you’re traveling in an unfamiliar area, you can check out Hooks that other users have made to find places to eat or things to do. Several of the categories have built in forms that help users to rate restaurants or places that they’ve visited. Even if you wind up in a place where you don’t have any internet connection, you can always build your Hooks and save them as drafts. That way, when you’re connected again, you can publish them all without risking forgetting the details of your adventure.

    Blurb
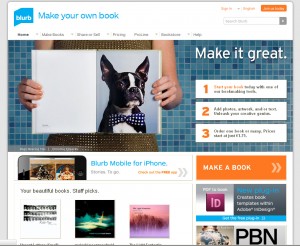
    Blurb Screenshot

    Once you’ve got your photos prettied up and organized, they are still sitting on your hard drive.  You can always get prints for the album or scrapbook, but if you’re feeling a little more ambitious you can order a hardcover photo book from Blurb. One of the really great features about Blurb is that there are several ways to create your book depending on your level of technical skill.  They have an online book builder that works very well.  You can upload your photos from your computer or access them directly from your Picasa or Flicr account. From there, you can choose to let the program place the photos for your or you can manually choose which photo goes where. They also offer a free downloadable program to build your book. It works very similarly to the online book builder, but is more fully featured and doesn’t rely so heavily on having good bandwidth for it to work. If you are particularly digitally savvy, you can upload a pdf directly or use their brand new plug in for Adobe InDesign.

    Blurb offers a variety of bindings and paper qualities.  You even have the ability to share your book with others or put it up for sale on their store. The price of your book is based on the quality, size, and number of pages.  They do offer discounts when you order multiples of the same book. When all is said and done, you wind up with a professionally printed photo book that would look great on anyone’s coffee table.
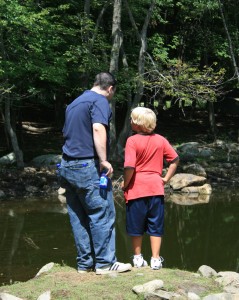
    Brian and Nick

    Brian and Nick at the zoo, 2005

    Summer is a time to get out of the house and go on adventures.  Make sure you document them well so you can relive all those good times for years to come.


  5. Sam’s Ork Birthday

    July 6, 2011 by Daniora

    Last month, one of my best friends, Sam, turned 30.  In honor of the occasion, we threw him an Ork birthday party.

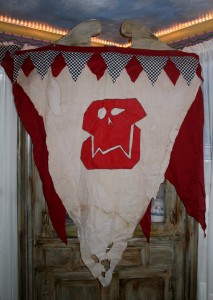
    Ork Banner

    An Ork war banner I made. It would have been hanging outside had it not been pouring rain.

    Along with some of our other friends, Sam enjoys playing Warhammer 40k, especially Orks.  If I had to wager a guess, I’d say it’s more the attitude and less the gameplay that draws him to the green-skinned tide of destruction.

    For those of you not in the know, Warhammer 40k is a tabletop game played with miniature models of the different troops and vehicles.  You command your own army of miniatures, which you have lovingly assembled and painted, and march them across the table to victory or death.  Some games involve an objective but most are just a fight to the death. Combat is determined by a roll of the dice and he who rolls well wins.

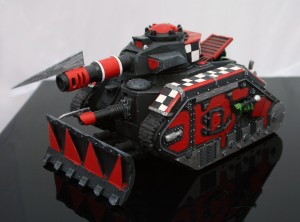
    Ork Wartruk

    An Ork tank that I built and painted for Sam a few years ago.

    There are several different factions one can choose from when starting a Warhammer army.  There are the Space Marines, the insect like Tyranids, and the Chaos Daemons summoned from the great beyond to name but a few.  Sam plays Orks.  Orks are the greenest, fightingest, drinkingest army there is.  They believe that by painting a vehicle red, it will be able to move faster… and it works.  They speak with an over the top Cockney accent and any victory truly seems to come by luck rather than by ruthless military strategy.

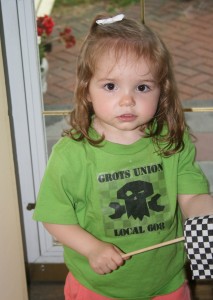
    We had several small children in attendance, and for them I had made Grots Union t-shirts (Grots are little goblin-like creatures that the Orks use as slaves… and frequently ammunition). They were all members of Union Local 608, June 8th being Sam’s birthday.

    Grot shirt

    The Grots Union shirt, modeled here by Miss Ava.

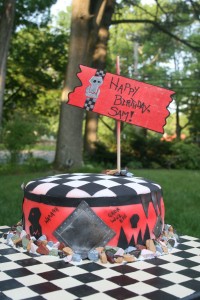
    Because checkerboard patterns are a part of the Ork decoration, I was able to use some racing party supplies to augment the banner and pennants that I had made from scratch. The centerpiece of my Orky theme, however, was the cake.

    Ork Cake

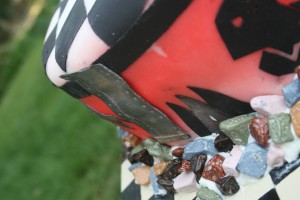
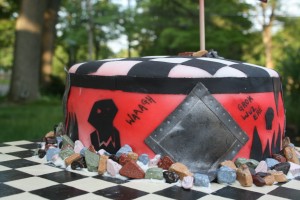
    I’m not going to lie. I’m pretty proud of this one.  I’m not a huge fan of fondant, at least not from a taste standpoint, but I do enjoy using it. There are some things that buttercream and royal icing just won’t do. This time I also used the new Wilton icing sheets.  (I’ll do a whole separate post on that. Awesome new product!) By brushing the pieces of the icing sheet that I had cut out with metallic color dust, I was really able to get pieces that looked like metal. I found some fantastic candy rocks at a local shop. They’re actually very similar to M&Ms, just rock shaped. They looked great all piled together.

    Ork Cake DetailOrk Cake Detail

    One of the most exciting moments of the party for me was when people had to ask if the rocks and metal bits were edible. That was when I knew I had done a good job.

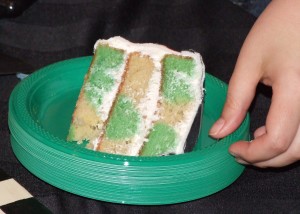
    For the interior, I decided to keep with the checkerboard theme using the Wilton Checkerboard Cake Pan Set. Instead of doing the traditional vanilla and chocolate checks, I opted to do the whole thing in vanilla, tinting half of the batter green. It was a pretty warm day when I baked, and the batter was a little runnier than I would have liked, so my checks were a little off kilter.  Fortunately, it fit right in with the Ork theme.

    Checkerboard Cake

    Checkerboard cake

    All in all, it was a terrific party.  I wish the weather had been better, both on the day of the party and while I was trying to decorate the cake. I have even more admiration for my mother who made my birthday cake every year in the middle of July without air conditioning. (Thanks, Mom.) There are plenty more nerdly birthday celebrations on the horizon, and I’m sure many of them will include more nerdly baked goods.